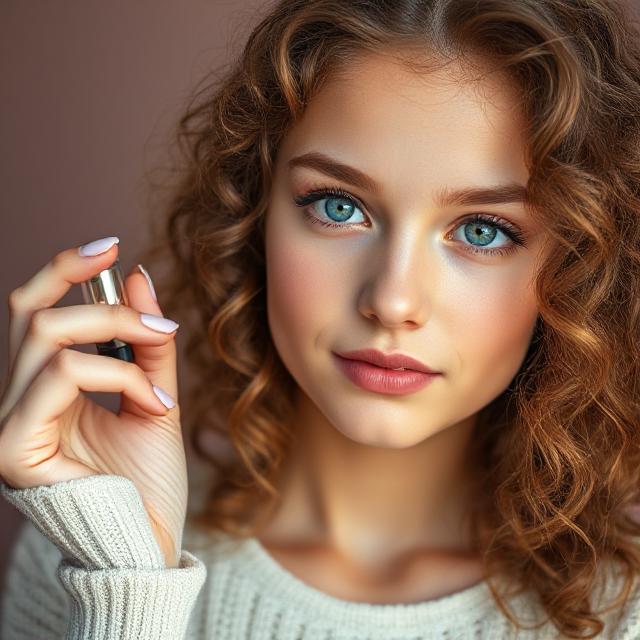
How to Apply Highlighter: Ultimate Guide for a Radiant Look
-
 Admin
Admin
- 06/07/2025
Do you want your skin to appear glowing, youthful, and photo-ready? Applying highlighter correctly may transform your makeup look from drab to amazing. You'll learn all you need to know about applying highlighter in this comprehensive guide, including types, tools, techniques, and expert advice for both novices and cosmetic enthusiasts.
In addition to knowing where and how to apply highlighter, you will also know how to select the best formula for your skin tone and type at the end of this article.
Table of Contents
What Is a Makeup Highlighter?
Why Should You Use Highlighter on Makeup
How To Choose the Right Highlighter
Which Highlighter Is Best for Your Skin Type?
Tools for Perfect Highlighter Application
How to Apply Highlighter Step By Step For A Radiant Look
How to Highlight Based on Face Shape
What Not to Do With Highlighter
Advice for Various Skin Tone
Highlighters Suggested by Skin Type
Concluding Remarks
1. What Is a Makeup Highlighter?
The purpose of a cosmetic highlighter is to draw attention to the high parts of the face, such as the nose bridge, cheekbones, brow bones, and cupid's bow, by reflecting light. Depending on the application method, the objective is to provide dimension, brightness, and either a dramatic or natural glow.
2. Why Should You Use Highlighter on Makeup
Adding a highlighter to your cosmetic routine can improve your appearance in a number of ways.
Enhances dimension: Draws attention to specific areas of your face to contrast blush and contour.
Brightens complexion: Gives life and vitality to lifeless or exhausted skin.
Lifts features: Uses positioning to create a sculpted look.
Reflective shimmer makes your features stand out in pictures.
3. How To Choose the Right Highlighter
There are various formulas for highlighters. Making the correct choice is crucial to getting the shine you want.
a. Highlighter in Powder
Perfect for mixed or oily skin types
creates a subtle, buildable sheen
It is best applied using a brush.
b. Dry or older skin types respond well to liquid highlighters.
It can be used directly or combined with foundation.
provides a natural, dewy finish.
c. Highlighter Cream
Ideal for a delicate glow
blends in perfectly with a sponge or fingers.
Excellent for dry to normal skin
d. The Sticky Highlighter
Travel-friendly and convenient
Simple to combine and swipe
Ideal for fast touch-ups
4. Which Highlighter Is Best for Your Skin Type?
Not every skin tone or type responds well to all highlighters. To find your mate, follow these steps:
Fair Skin
Use light champagne or pearly tones
For Medium Skin
Try rose gold or peach hues.
For Olive Skin
Choose amber or golden colors.
For Dark Skin
Choose deep gold, copper, or bronze hues.
5. Tools for Perfect Highlighter Application
The way your highlighter blends and looks can be greatly altered by using the appropriate equipment.
Fan Brush: Excellent for applying powder highlighter gently.
Tapered Brush: provides more precision.
Beauty sponge: Ideal for mixing cream and liquid mixtures
Fingers: Helpful for quickly combining stick or cream highlighters
6. How to Apply Highlighter Step By Step For A Radiant Look
This is a thorough guide on how to use highlighter for a natural glow:
Step 1.get your face ready.
Start with skin that is clean and hydrated. Start with a foundation and primer.
Step 2.Apply base makeup
First, finish your contour and concealer routine. Typically, you apply highlighter last on your face.
Step 3: Select Your Item
Select a highlighter based on your desired glow intensity (strong or subtle) and skin tone.
Step 4: Highlight Important Areas
Above the cheekbones: Above the blush, dab or swipe the highlighter.
Bridge of Nose: To enhance dimension, lightly draw a line.
Cupid's Bow: Dab slightly to give the appearance of larger lips.
Brow Bone: To define and raise eyes, apply beneath the brows.
Eyes' inner corners: enlarges and brightens the eyes.
Step 5: Mix Well
For a natural finish, blend the product with your fingers, a clean brush, or a sponge.
Step 6: Use Spray to Set (Optional)
To extend the wear of your highlighter, seal your look with a setting spray.
7. How to Highlight Based on Face Shape
You can use highlighter more skillfully if you are aware of the form of your face.
Round Face
To make the face appear longer, draw attention to the forehead and cheekbones.
Oval Face
For symmetry, pay attention to the brow bone, nose bridge, and cheekbones.
Square Face
Emphasize the middle of the forehead and chin to soften angles.
Heart Shape Face
To balance the upper and lower face, apply to the chin, cheeks, and temples.
8. What Not to Do With Highlighter
By avoiding these mistakes, you can always get a perfect glow.
Applying too much can result in a greasy, rather than glowing, appearance.
Selecting the incorrect tone: A mismatch can give the appearance of dirty or ashy skin.
Ignoring blending: The appearance might be ruined by harsh lines.
Emphasizing greasy spots: Steer clear of the chin and forehead if you're oily.
9. Advice for Various Skin Tone
Use light pearl or ice pink hues if you have fair skin.
Steer clear of gold hues since they could appear overly yellow.
For medium skin, choose champagne and rose gold hues.
Steer clear of glaring, too-cold hues.
Rich copper, bronze, and gold tones are ideal for deep skin.
Steer clear of white-based highlighters as they may leave a gray tint.
10. Highlighters Suggested by Skin Type:
For Oily Skin
Fenty Beauty Killawatt Highlighter
Maybelline Facestudio Master Chrome Highlighter
For Dry Skin
Charlotte Tilbury Beauty Light Wand
L'Oréal True Match Lumi Glow
Combination Skin
Rare Beauty Positive Light Liquid Luminizer
Hourglass Ambient Lighting Powder
Concluding Remarks
Gaining proficiency in the step-by-step application of highlighter can significantly improve your appearance. Selecting the ideal formula, color, and application for your particular face shape and skin tone is crucial, regardless of your preference for a delicate, understated glow or a striking, dazzling shine.
Try out some of the advice in this article and remember to blend properly for a smooth finish.